AKA Gear Post #2
This is the second of two posts about sound gear for open mics. Last time, we met Tongue & Groove’s official Sound Guy Andrew Crowe (check out his cover of “A Good Year for the Roses”). He shared a list of essential equipment, brand recommendations, and his abiding philosophy.
This time, Andrew talks technique that applies no matter what gear you have, so your show can sound its best.
Clarity and intelligibility are paramount
Some things bear repeating, so first let’s recap that philosophy:
The purpose of amplification is to make it easier for everyone in the room to hear the performers.
Think of the ideal volume as being a warm presence — loud enough to envelope the listener like a hug, not loud enough to slap them in the face.
To find out if the sound is on point, sit at the back of the room. Can you understand every word without having to lean forward in your seat? If you’ve added reverb or other sound effects, are they adding richness or muddying the sound?
Bottom line: if you find yourself fretting over knobs and buttons, come back to this question: Can I hear the performer clearly?
Why your show needs a sound guy/gal
Before getting into sound technique, the first question every open mic host needs to answer is, who’s job is this? Because, tempting as it is to do a one-time mic check on your own voice before the show and never touch the knobs again, set-it-and-forget-it is not a good idea.
By definition open mic draws performers with widely varying styles and skill levels. Some poets whisper, some shout. Some guitar players finger-pick. Others strum like the die-cast punk rockers they are. The levels that work for one performer will make others painfully loud or inaudible.
To give each song/poem/story its due, at the very least do a quick sound check and adjust the volume at the beginning of each slot.
Better yet, recruit someone on the organizing team (and you do need a team) to focus exclusively on the sound board/app. That way they can make small tweaks during each performance and — and this is important — revert back to the host setting in between slots.
Resetting is especially important if you turned the volume way up for a quiet talker.
To quote Andrew, “I know the Anna Weaver host setting by heart.” He drops the volume the instant each performer finishes, sparing our audience a wincing they 100% would not appreciate and do not deserve.
8 essential tips for better sound
Assuming your designee isn’t already a certified sound engineer (if so, lucky you), here’s a few tips to pass along:
- Cover the mic switch. If your mic has an on/off switch, turn it on and cover it with gaff or duct tape — forever. One fumbling hand is all it takes to send everyone scrambling, jiggling cables and cursing the sound demons…only to realize that the mic got switched to OFF.
- MUTE all channels that aren’t being used. You might be surprised how much awful noise can come from a stray cable lying on the floor with the channel open.
- Mind the pop. If your show welcomes musicians, make doubly sure that the instrument channel is muted before each guitar player plugs/unplugs the cable.
- Start guitar levels very low, and then bring them up quickly as they begin to play. Instruments vary greatly in the strength of the signal they send, and you want to avoid any deafening surprises. If you’re lucky, they’ll strum a few chords while they introduce themselves so you can get a quick level.
- Place the guitar just “behind” the vocals (read: slightly quieter). The volume levels will be pretty similar, but the vocals should come through first, supported by the instrument.
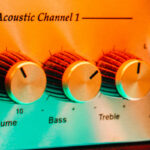
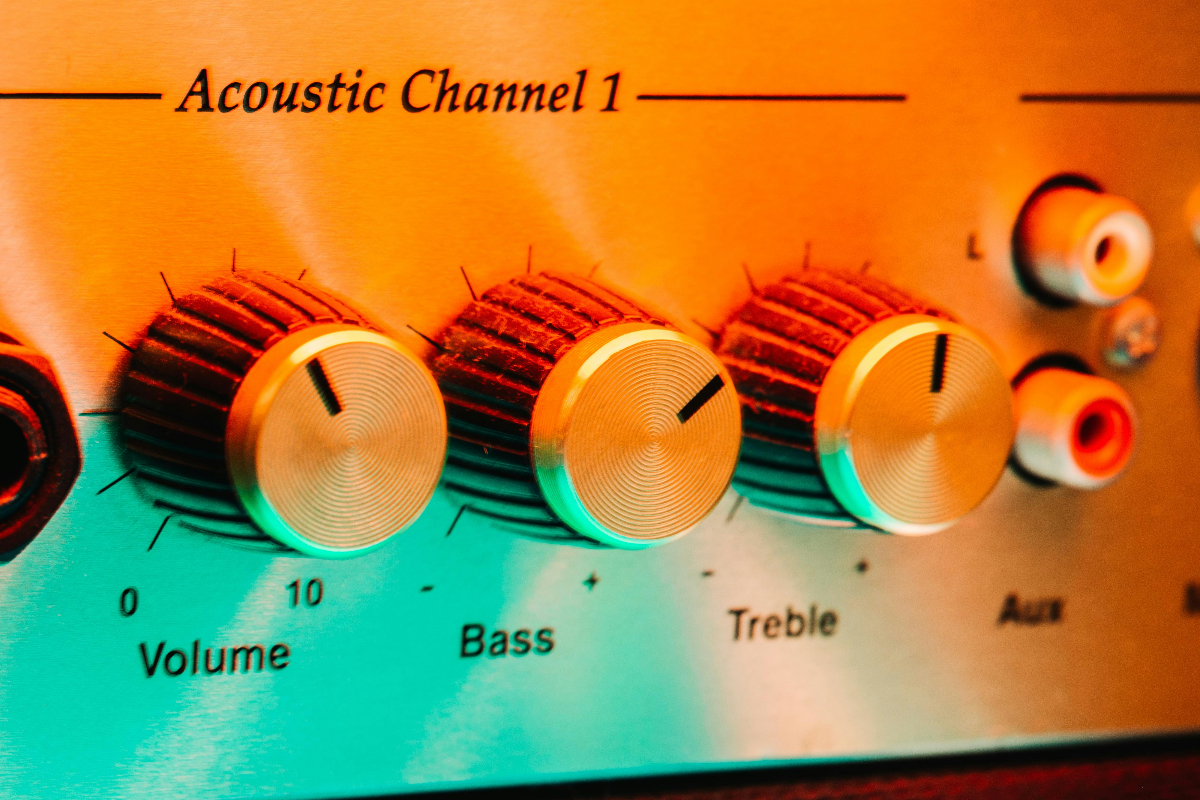
- If your sound system has EQ, keep it flat — all knobs in the middle — at least to begin with.
- When you’re ready to explore, use EQ sparingly. Tiny adjustments can make a big difference. High frequencies can add clarity and sparkle, but if you boost them too much, the sound gets harsh and tinny. Low frequencies can add warmth and richness, but if you boost them too much, the sound gets thumpy or muddy..
- Got popping or crackling? Check the mic cable first. They go bad surprisingly often and can make awful sounds. Turn the volume on and wiggle the connection points. If it crackles when you wiggle it, replace the cable.
- Be good to your cables. Always wrap cords a bit loosely to avoid damaging the wiring inside. You’ll get more life that way.
Coach performers in good mic habits
Even if you have sweet gear and do All The Things, your performers can still tank their own set. Mic technique makes a huge difference in how well the audience can hear, and it’s important to remember that this is a pretty advanced skill.
On any given night, you may have folks on the list who have never once stood at a mic. And even if they have, they may not be aware of just how sensitive microphones are to proximity and direction.
As host, helping them out is part of your job.
To avoid calling out novices or embarrassing anyone, drop a little coaching in your welcome speech. Tell performers that the microphone should be 2-6 inches from their mouth, level with the floor, and pointing directly at their lips.
That’ll give first-timers a little confidence and reinforce good habits for regulars (and yourself), making the entire show a better experience for the audience.
Your greatest asset and liability is the space you’re in
Oh, the motley glory of open mic venues…
Some rooms make everything sound great. If that’s you, all you need to do is stay out of the way.
But other rooms are cavernous and echoey. Others are dead and lifeless. Some have a loud HVAC system that cycles on and off every 5 minutes, forcing you to ride the volume level to compensate. Some come with an espresso machine, four pool tables, and a drunk guy yelling at his sports team on the television.
There’s only so much you can do.
Just keep asking Andrew’s golden question: Can I hear the words?